Anti-theft Protection for Catalytic Converters on Moving Vans
It turns out these catalytic converters hold precious metals that convert harmful emissions into less harmful gasses. And they’re more valuable than gold! These precious metals include platinum, rhodium, and palladium. As of May 2021, rhodium was valued at $27,900 per ounce, palladium at $2,896 per ounce, and platinum at $1,227 per ounce. And with anything precious in this world, thieves are coming after it. Occasionally, thieves may target trucks and SUVs because of the higher ground clearance they yield. These thefts are fast and simple – the thief slides under the car and removes two or three bolts, or may even opt to cut it out with a reciprocating saw. The sawing can be noisy, but in just a couple of minutes, it’s over and the part just falls out. You’d be surprised at the number of thefts that occur during the day and in plain sight!
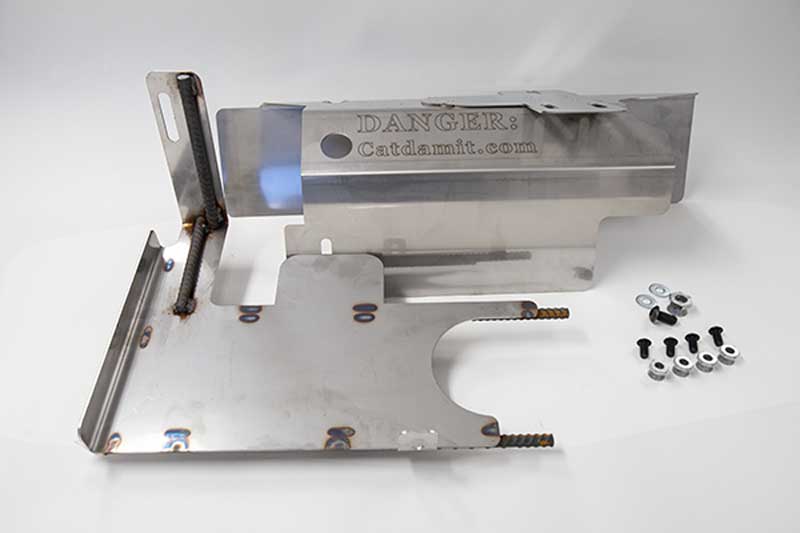
Catdamit Catalytic Protection Cover is made of thick steel which will not be very easy nor quick to cut through with portable saws. The cover prevents the catalytic converter from being disassembled and removed from under the truck while the cover itself has tamper resistant bolts. Thieves will see this unit and move on since it is no longer an easy target. Protect your vehicle and keep your fleet in operation!
Catdamit Catalytic Converter Anti-theft Cover fits most trucks including the Ford F650!
Have your Catdamit device installed during your moving van body build at Allvan or purchase kits for the remainder of your fleet below. The unit is easy to install yourself with helpful instructions below.

Catdamit Catalytic Converter Protection Cover
Watch the Catdamit’s Easy to Install Instruction Video Here
Instructions:
STEP 1: Begin with the rebar plate. Turn 90 degrees (rebar facing passenger side frame rail) and raise the rebar plate between the passenger side frame rail and the catalytic converter. Once it has passed the catalytic converter, turn it back to the original position and place it on top of the catalytic converter.
STEP 2: Slide the c-channel bracket between the support bar and the catalytic converter. Ensure the holes in the c-channel bracket are lined up with the holes on the support bar. There should be a 1/4” gap between the c-channel bracket and the passenger side frame rail.
STEP 3: Place 2x 3/8” bolts and 1x 1/2” bolt in the holes on the mounting plate of the c-channel bracket.
STEP 4: Move the rebar plate into the 2 holes located on the front of the c-channel bracket (closest to the rear).
STEP 5: Hand-tighten nuts onto the bolts (cone side up) that connect the c-channel bracket to the support bar.
STEP 6: Use a 3/4” socket and a 7/32” tamper resistant hex L key to secure the 3/8” bolts. Use a 1” socket and a 5/16” hex L key to secure the 1/2” bolts. They are fully fastened after the hex L portion of the nut has broken off.
STEP 7: Align the tab on the rebar plate to the slot on the c-channel bracket (closest to driver side frame rail) and insert a 3/8” bolt from inside the c-channel bracket. Hand-tighten the 3/8” nut.
STEP 8: Align the horizontal slot on the rebar plate to the hanger on the passenger side frame rail. Insert a 3/8” bolt with a 3/8” washer. Place another 3/8” washer on the back side of the bolt. Hand-tighten the 3/8” nut and use the 3/4″ socket and 7/32” tamper resistant hex L key to fully fasten.
STEP 9: Fully fasten the bolt from step 7 with the 3/4″ socket and 7/32” tamper resistant hex L key.

Tools needed:
3/4” socket
1” socket
7/32” tamper resistant hex L key
5/16” hex L key

Parts list:
c-channel bracket
rebar piece
4x 3/8” tamper resistant hex bolt
1x 1/2″ hex drive bolt
4x 3/8” breakaway nut
1x 1/2″ breakaway nut
2x 3/8” washer

